As my lovely hand-me-down Lenovo IdeaPad Yoga 13 from 2013 had been falling apart for a few years now and its plastic began to disappear, I decided to go for another hand-me-down Lenovo IdeaPad. I had chosen this one for my mom a year ago, and it had served her very well, especially for the price – ~500$ equivalent for a Ryzen 7 3700U with Radeon RX Vega 10 Graphics and 8GB of RAM. The benefit of having graphics equivalent to a Radeon RX550 required a tradeoff which meant 2GB of RAM would be used as VRAM. This left the available RAM at only 6GB – merely running Windows 11 with a few Chrome tabs would use up almost all of the available system RAM. It was time for a change, and luckily Amazon was having sales.
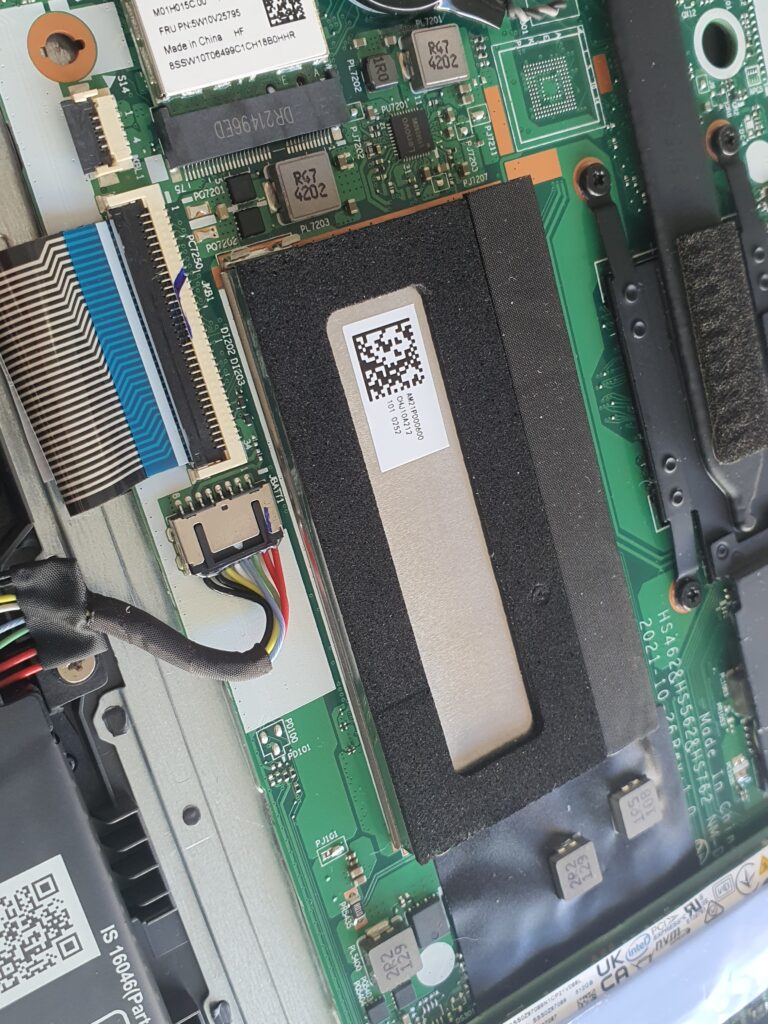
For less than 20 euros with free shipping I got my RAM less than 12 hours after I had ordered it. Opening up the laptop took only a small Philips-head screwdriver, keeping in mind that the four screws on the front were shorter than the others on the back. However, when I opened the laptop to find where the RAM was, I saw a large metal shield on top of it. I made this blog post mostly to show others how to remove it and what to keep in mind when doing so. This is what the shield looks like:

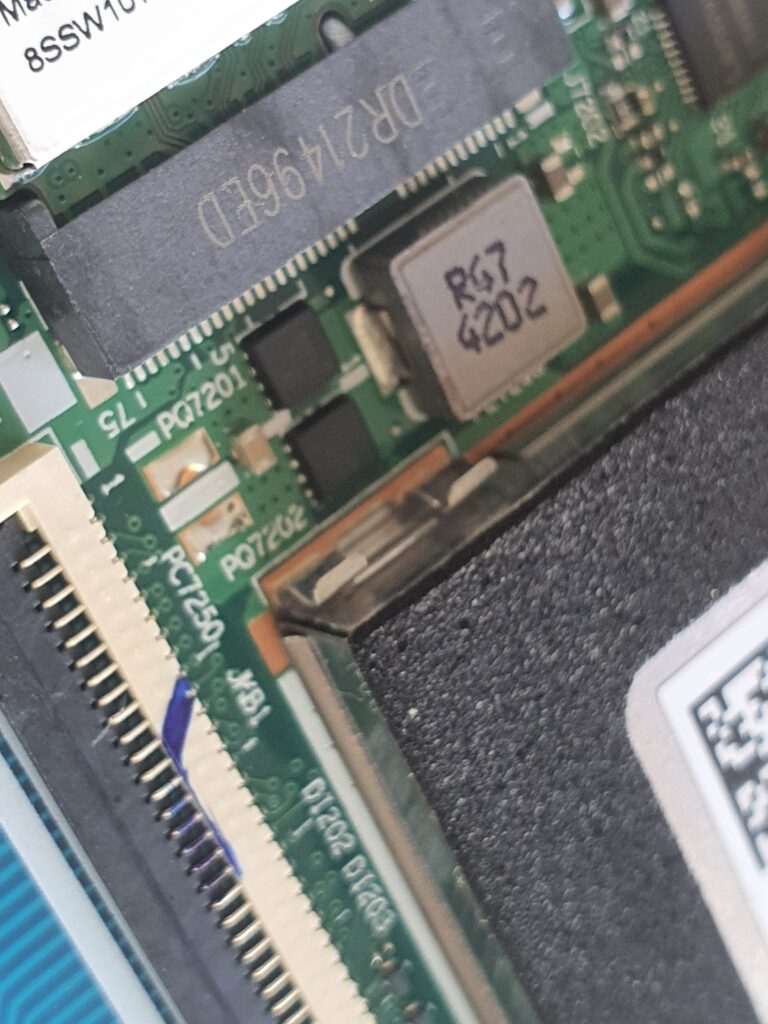
The shield is kept in place by two pairs of clips on both sides (from the RAM stick’s perspective), with two more pairs of clips on the bottom. To remove the shield, gently slide a flat-head screwdriver between both pairs of clips on the sides. They should make a sound of disconnecting. Make sure to be gentle, so as to not remove any of the small components on the side. The clips you need to displace are those shown on the picture below, and the corresponding pair on the other side.

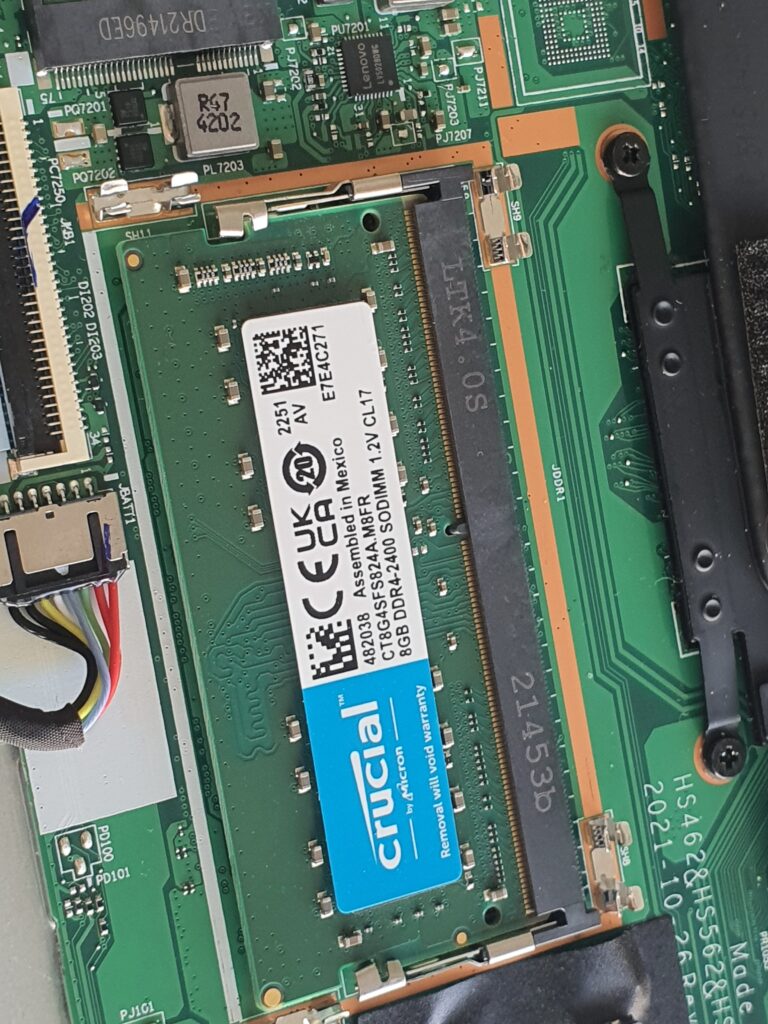
Once you displace them, the shield should be easy to lift up. If not, make sure to do the same to the other two pairs on the side. Afterwards, you will see the RAM slot and can do the regular RAM replacement procedure – just move the metal handles on the opposite side, slide out the old RAM, and then move in the new RAM and push it down so it snaps into place. Then, you can put the shield back on, though it’s not necessary at all for the laptop to work – but more on that after the photo of how everything should look once the RAM has been replaced:

Lenovo probably put the metal can around the RAM to pass EMI regulations. If you don’t understand – basically, every electronic chip, when in use, emits radio waves whose frequency depends on the frequency that the chip is running at. Since the laptop on this RAM runs at 2400MHz – which is the same frequency as regular WiFi – the RAM could have been interfering with WiFi. However, WiFi is also a very robust protocol which was designed to withstand such noisy environments. Thus, theoretically, keeping the metal can off wouldn’t make a difference at all, except for a decrease in the performance of the WiFi. However, the metal can being there could also mean that the EMI from the RAM was significant enough to require a relatively expensive shield – thus keeping the can off could decrease the stability of the system. I managed to boot the laptop without it, but I didn’t try to use the laptop for long without it, simply because I don’t have a place and need for a small metal can.
Regardless, the laptop works perfectly and has a lot more headroom for running complex programs now. Funnily enough, the CPU in this laptop is so fast that my laptop is now faster than my desktop, which still has a relatively old Intel i5-7400. I’d like to upgrade that too, but I don’t have the money and I don’t actually have any issues with it for any of my workloads.