Reusing junk to make it useful
Required materials:
- 1x Old (or new) PC fan
- 1x USB phone charger
In this post I will show you how to turn an old PC fan into a desk fan. Fans can be used in many DIY projects, and are in general very useful for many things.
Why would you build one
Not only are these DIY fans better than store-bought ones, both in price and functionality, but they are much better for the environment. First, how are they better?
Computer fans use what are called DC motors, while desk fans use AC motors. AC motors generally just plug into a wall outlet and use that electricity directly, while DC fans need a power supply (the phone charger in this case).
Because the DIY fan runs at a much lower voltage than desk fans, it uses much less energy (220V vs. 5V), while not being that much worse. Some say that they waste 70% more energy to achieve the same performance.
Because computer fans are meant to be put in computers, they need to be silent and not vibrate a lot. Many parts in a computer (especially the hard drive) can be destroyed from vibrations, so it’s important for the fans to not vibrate. When something doesn’t vibrate, it makes less noise, so these fans are much quieter than desk fans.
Because we will turn these fans into USB fans, they can also be portable and can be powered from a battery bank. All in all, they are just better than desk fans.
Building the fan

Building these USB fans is really easy. You need to take a USB phone charger. Look at the side on the phone charger where there are numbers. It should say „5V“ or more, and where the capital A is, the number should be above 1A. That number indicates the amps that the charger can supply. The more amps, the more fans you can connect to the same USB charger.
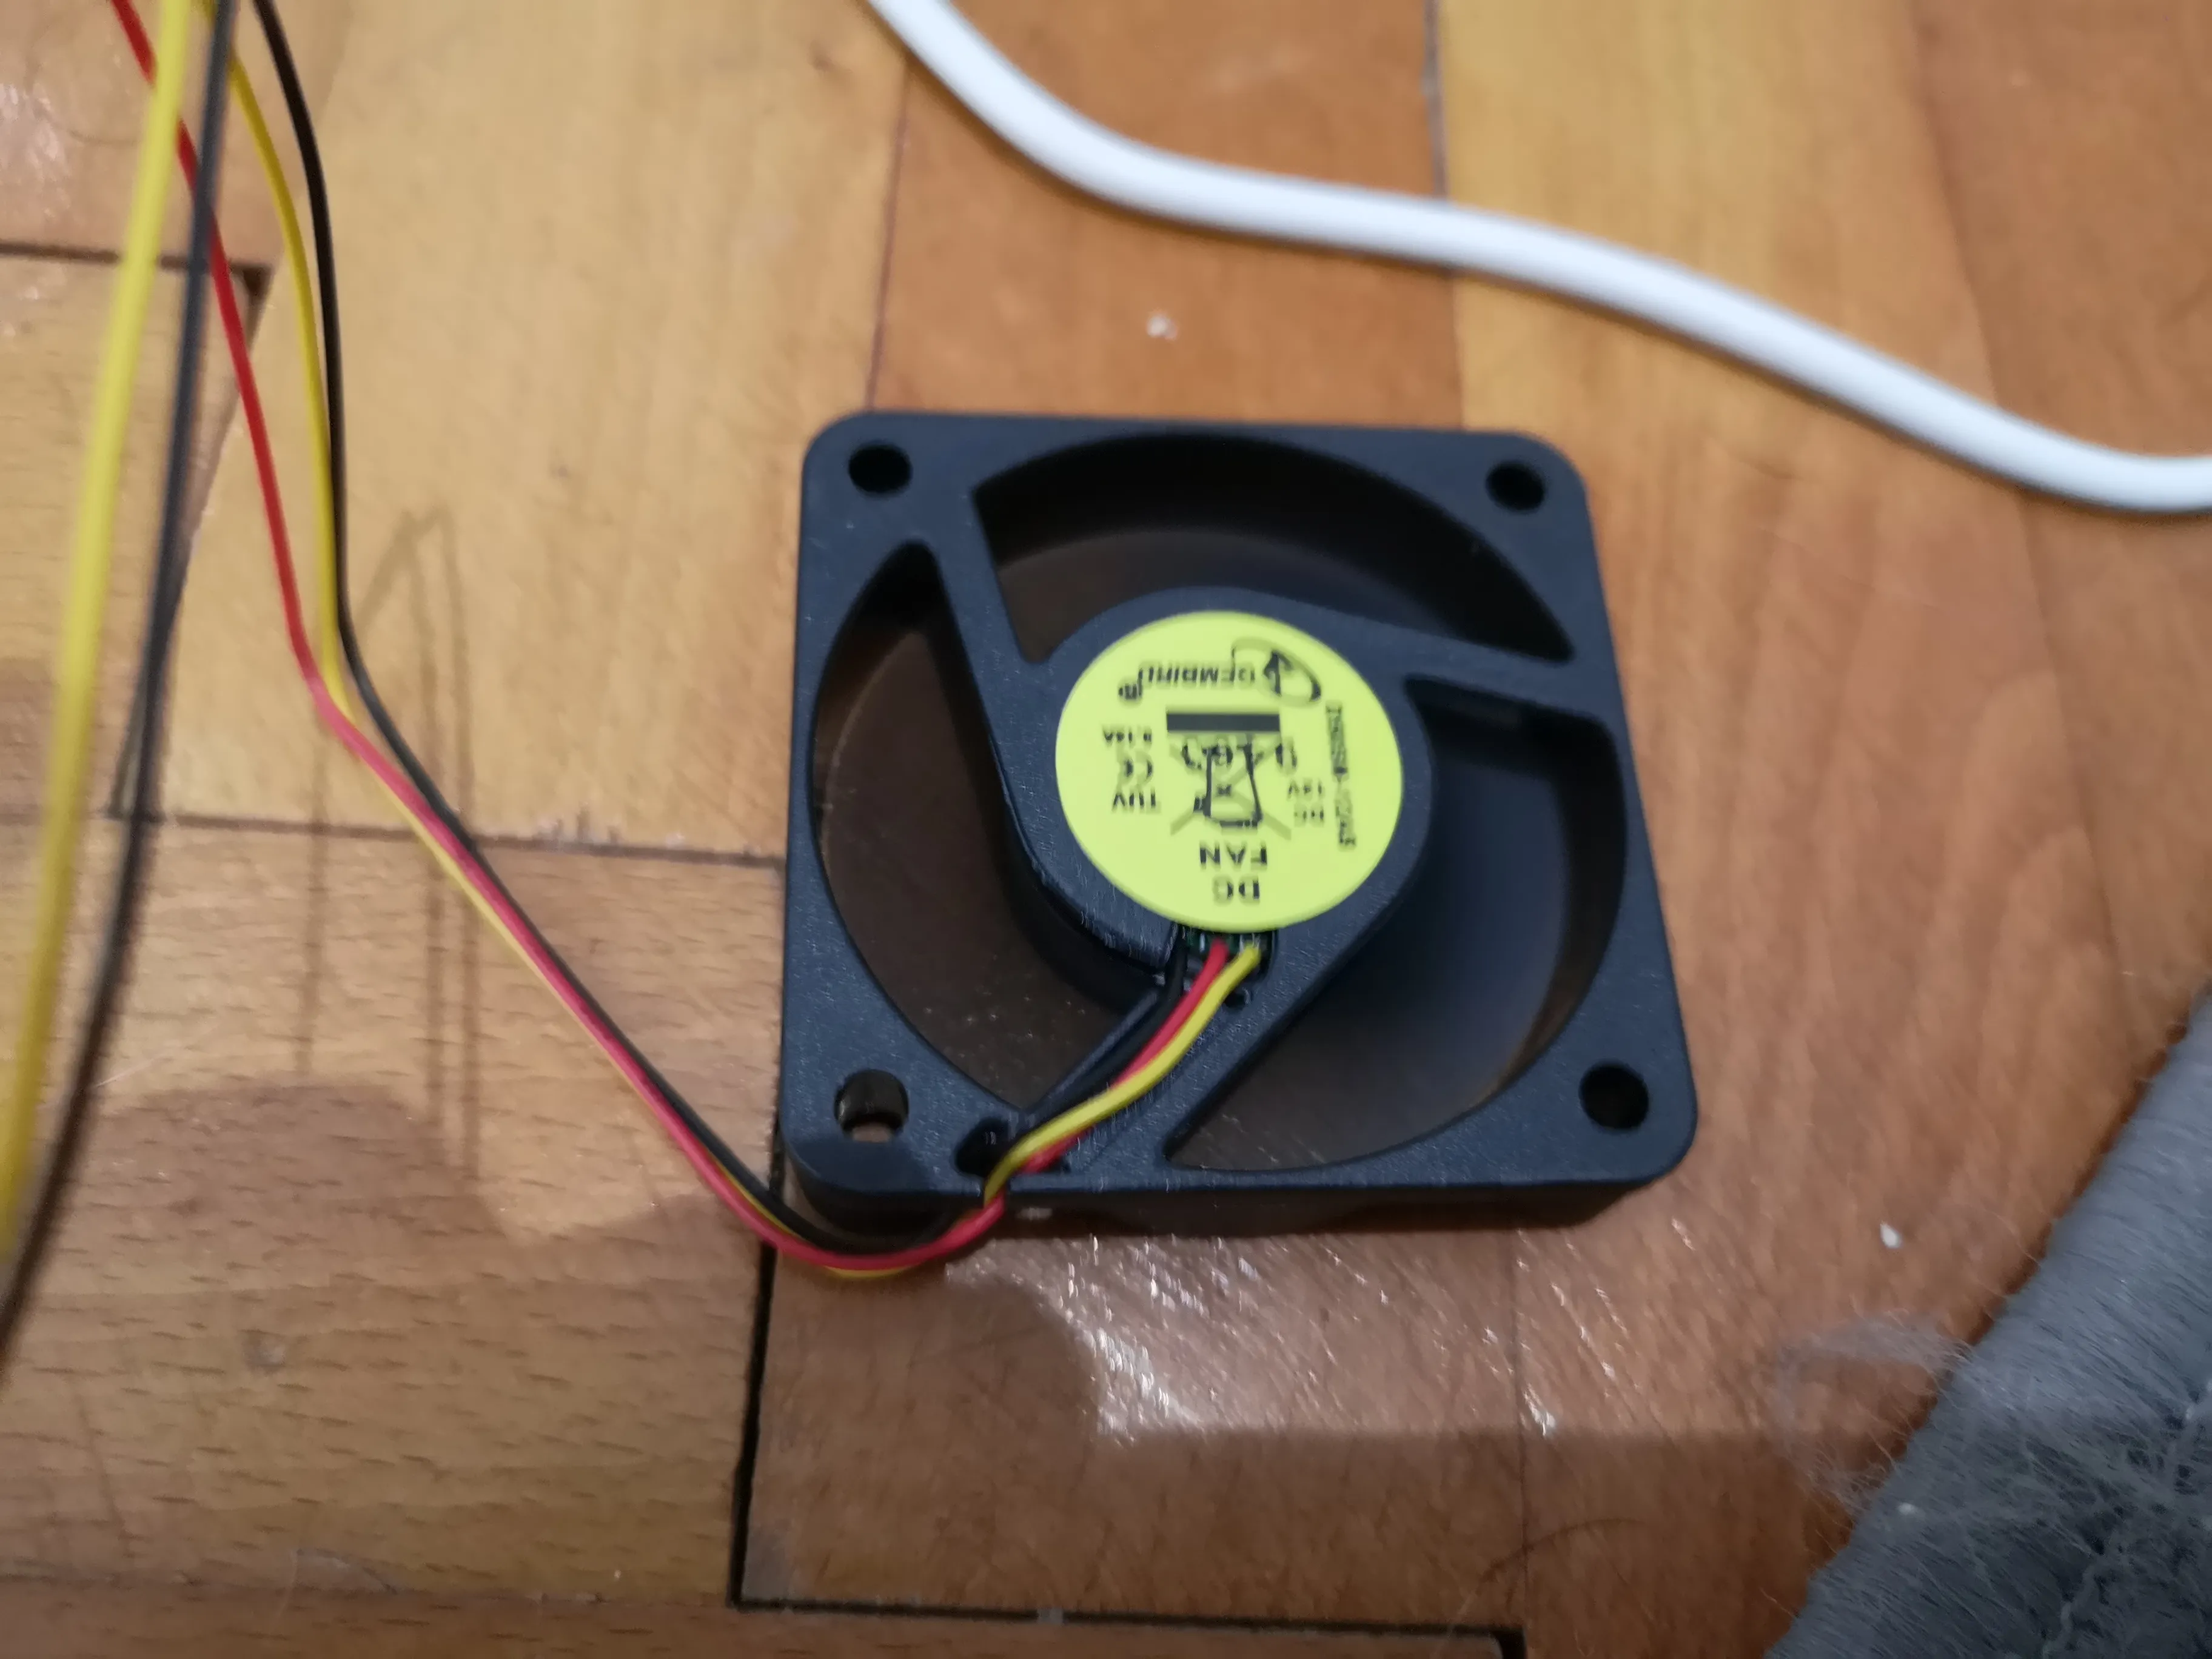
Take the USB power cable and cut it at the tip. Then, take the red and black wires and with a box cutter or scissors, carefully remove the plastic of the cable so that only the metal core of the wire remains.
Then, get the fan and find the red and black wires. There should be a small connector on the end of the cable for the fan. Connect the end of the red wire from the USB charger cable to the red wire of the fan through the connector, and do the same with the black wire. Then, use some tape to make the cables hold together.
If the fan doesn’t spin on its own, try pushing it once. The initial push needed for the motor to start is the hardest, and after that the motor requires less electricity.
More power
If the fan is spinning slow, it’s because we are using 5V to power it. PC fans are usually made for 12V, and it almost always says on the case of the fan how much power it consumes.
The fan I got for this demonstration said 12V and 0.12A, which if we multiply is 1.44W. That means that if a 5V power supply usually has 1A, then it will provide 5W.
With a 5W power supply, you could power 2 of these fans safely. For more power, you would need to buy a cheap module called a boost converter, or use 12V or 9V instead of 5V.
If you’re confused at the numbers just think back to middle school physics, nothing here is more complicated than what is learned in middle school.
I’m a fan of this!
The purpose for this fan for me is to do soldering more safely. Some people say that the fumes released when soldering are toxic and carcinogenic. While there’s not much proof, I’d rather stay on the safe side. Also, the smell of soldering can get pretty annoying and stick on you.
I bought a cheap carbon pad (~1$) from a local electronics shop and screwed it on one side of the fan so that it not only moves the fumes away, but it also makes them stick on the pad so they don’t gather in the room.
I didn’t use an old fan, rather I bought a new one for this, but doing some soldering I found the fan to work amazingly well! You can also mount these fans anywhere as they’re very quiet and very thin.
Some even come with RGB lights so you could make a very interesting decoration that way. With DIY, the possibilities are endless!